

beasty-visual-novel / authoring / story-graph.md
The story graph
The story graph is the canvas where you build a scene. You drop nodes on it, wire them together, and the game plays them in the order the wires describe. This page covers the canvas itself and the seven kinds of node you can put on it.
Open it with Tools > Beasty VN > Editor and pick the Story tab. Assign a Visual Novel (a
DialogueScene) in the top bar and its root graph appears.

The canvas
The Story tab has three parts:
- The Add blocks panel on the left. It fills the selected node with instructions. See Blocks reference.
- The graph canvas in the middle. Nodes and the wires between them.
- The node inspector on the right. Everything about the node you have selected.
Pan with the middle mouse button, zoom with the wheel, box-select with a drag.
Creating a node
Right-click an empty part of the canvas and choose from Create:
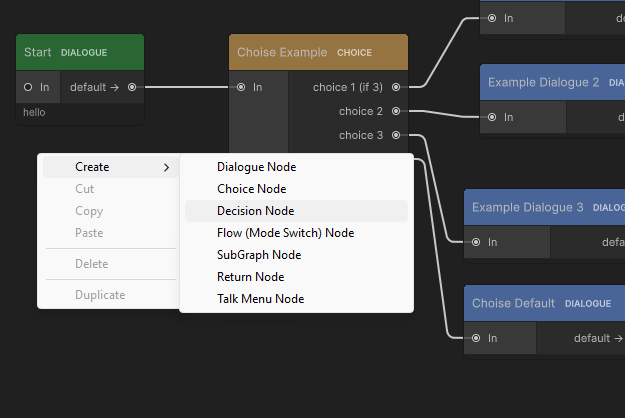
Create > Dialogue NodeCreate > Choice NodeCreate > Decision NodeCreate > Flow (Mode Switch) NodeCreate > SubGraph NodeCreate > Return NodeCreate > Talk Menu Node
The node appears where you right-clicked. The first node you create in an empty graph automatically becomes the entry node.
Wiring nodes
Every node has one input port, In, on its left. It accepts any number of incoming wires — several nodes
can lead to the same place.
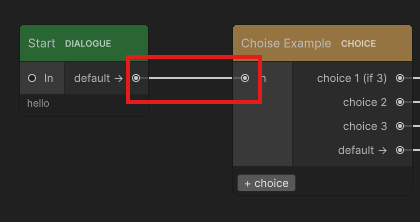
Output ports are on the right, and what they are depends on the node type (see below). Drag from an output
port to another node’s In port to connect them. Drag a wire away and drop it on empty canvas to
disconnect it, or select the wire and press Delete.
The entry node
Playback starts at the graph’s entry node. Its title bar is tinted so you can find it at a glance. To move
the start of the scene, right-click a node and choose Set as Entry Node.
The node context menu
Right-click a node:
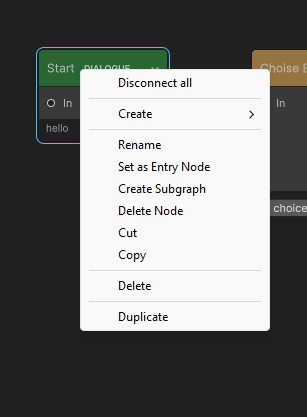
| Item | What it does |
|---|---|
Rename | Edits the node’s name in place. The name is for you, not the player. |
Set as Entry Node | Makes this node where the graph starts. |
Create Subgraph / Open Subgraph | Nests a graph inside this node, or drills into the one it already has. See Subgraphs. |
Copy / Cut / Paste / Duplicate | The clipboard, also on the usual shortcuts (Ctrl+C/X/V/D). See below. |
Delete Node | Removes the node. Any wires pointing at it are cleared. You are asked to confirm. |
Selecting a node and pressing Delete does the same thing, and works on a multi-selection.
Copy, paste and duplicate
The clipboard works on the selection — one node or many — from the context menu or with the usual
shortcuts (Ctrl+C, Ctrl+X, Ctrl+V, Ctrl+D). A paste is a real clone: fresh node ids, subgraphs cloned all
the way down, and the wires between the copied nodes kept. Pasting into the same graph also keeps the
selection’s outgoing wires to nodes you did not copy; pasting works across Story windows and across scene
assets, so a fragment can move from one DialogueScene to another.
Every localized text in the copy gets a new localization key, and its row copies every language column — so the copy arrives with all its translations, and editing its text never edits the original’s.
Colours
Nodes are coloured by type. A dialogue node, a choice node and a decision node are different colours in the canvas, so you can read the shape of a scene without opening anything. The colour is cosmetic and has no effect on the game.
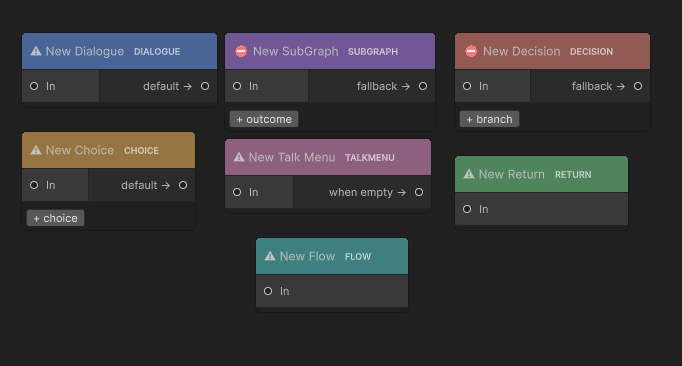
Dialogue Node
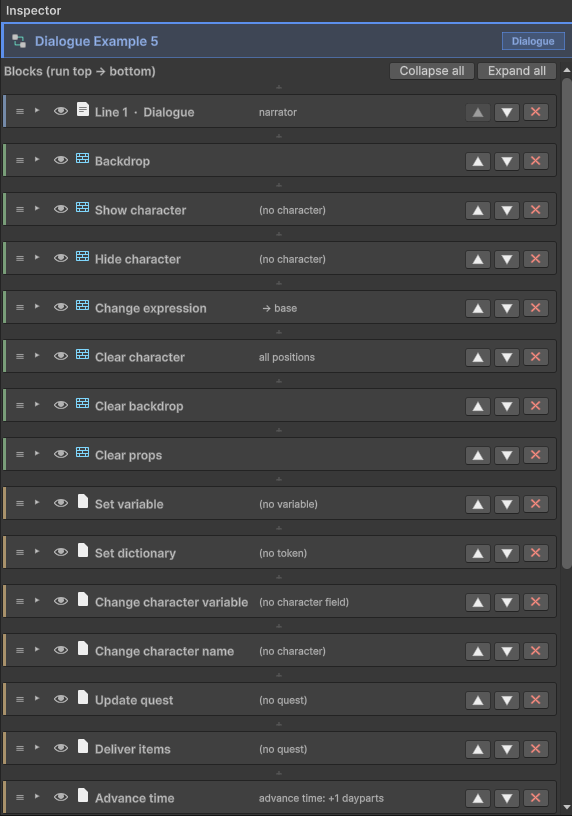
Reach for it when the player only needs to be told something. It is the node you will use most.
A dialogue node holds a stack of blocks — lines of dialogue, backdrops, characters, sounds, variable
changes — which run top to bottom. When the stack ends, the story continues along the node’s single output
port, default →.
If nothing is wired to default →, the story ends there.
Everything a dialogue node can contain is on the Blocks reference, and the two blocks you will use most are covered in depth in Dialogue and the stage.
Choice Node
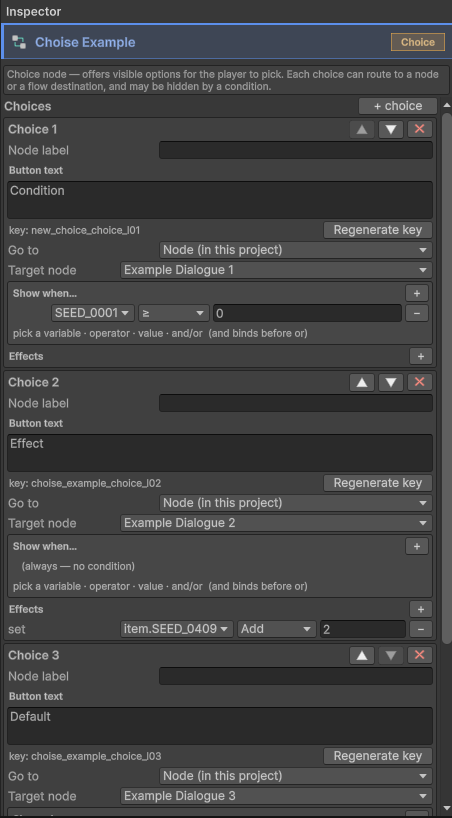
Reach for it when the player must pick. It shows a menu of options and waits.
A choice node holds no dialogue of its own. It has a list of options; each has a label, a condition that can
hide it, effects it applies when picked, and a target. Add one with the + choice button on the node, then
fill it in on the right.
Ports:
- One port per option. The port is labelled with the option’s name, plus a hint when it is conditional
(
(if 2)= two clauses) or when it leads out of the novel. default →— where the story goes when no option is available, because every one of them was gated out by its condition. Wire it, or a fully-gated choice node dead-ends.
An option can also target a flow exit instead of a node, in which case it has no wire. See Choices and decisions.
Decision Node
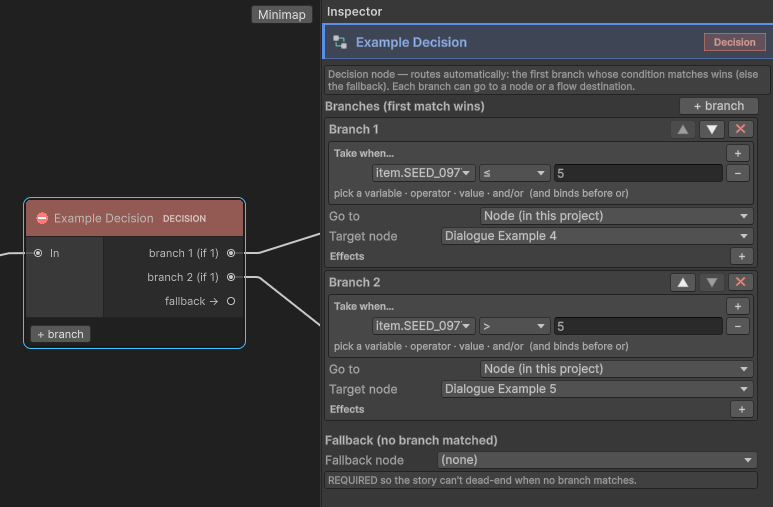
Reach for it when the story must branch but the player must not know it is branching.
A decision node is a router, not a menu. It shows nothing. The player never sees it, never clicks anything, and cannot tell it is there. When the story reaches it, it walks its branches from top to bottom, takes the first one whose condition passes, applies that branch’s effects and jumps.
This is the distinction people get wrong. If you want the player to choose, use a Choice Node. If you want the world state to choose — the player already has the key, it is already Friday, the affection is already above 40 — use a Decision Node.
Ports:
- One port per branch, in evaluation order. A branch with no condition is labelled
(always), because an empty condition always passes; anything below it is unreachable. fallback →— taken when no branch matches. Always wire it.
Add a branch with the + branch button on the node.
Flow (Mode Switch) Node
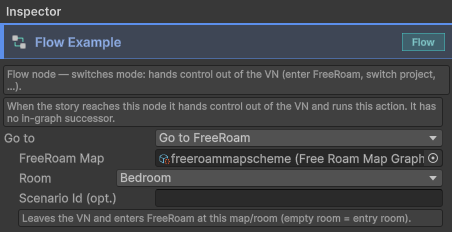
Reach for it when leaving the novel deserves its own box in the graph.
A flow node carries exactly one exit: enter free roam, return to the room the player came from, let the player choose a room, or jump to another Visual Novel. When the story reaches it, it hands control out and the visual novel stops.
It has no output port. There is no “after” inside this graph.
The same four exits also exist as blocks you can put at the end of a dialogue node. When to use which is covered in Transitions.
SubGraph Node
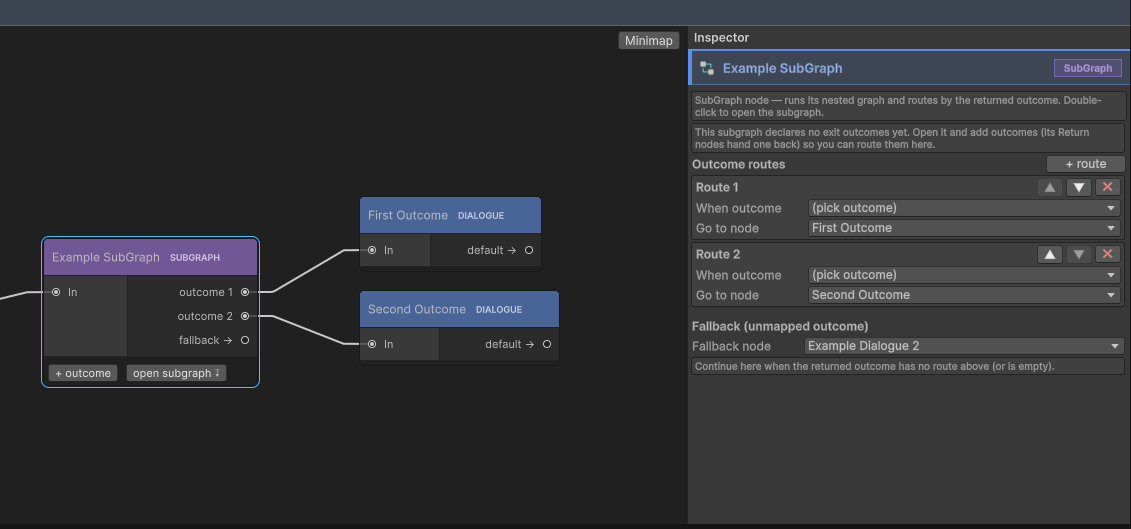
Reach for it when a stretch of story is reusable, or big enough to deserve its own canvas.
A subgraph node calls a nested graph. The nested graph runs to a Return Node, which hands back an outcome
— a short word you choose, like win or refused — and the subgraph node routes on it.
Ports:
- One port per outcome route you have added. Name the outcome, wire the port to where that outcome should continue.
fallback →— taken for any outcome you did not route, including an empty one.
Add a route with the + outcome button on the node. Full walkthrough in Subgraphs.
Return Node
Reach for it to end a subgraph.
A return node has an outcome key and a list of effects. It applies the effects and hands the outcome back to the SubGraph Node that called it.
It has no output port. It is a terminator: control goes back to the caller, not to a sibling node.
A return node only makes sense inside a subgraph. See Subgraphs.
Talk Menu Node
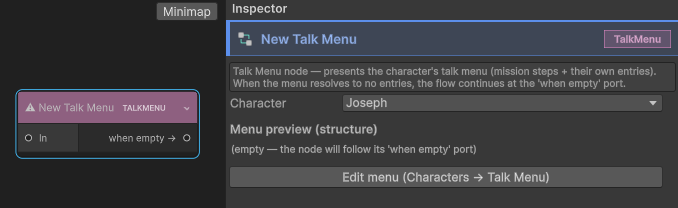
Reach for it when the player should choose what to say to a specific character.
A talk menu node names one character and presents that character’s talk menu — the entries you authored under
Characters > Talk Menu, plus the talk steps of their active quests, which are inserted automatically. It is
the conversation hub you get by clicking a character in a room, exposed as a node so you can reach it from
inside a scene.
Ports:
when empty →— where the story goes when the menu resolves to no visible entries at all. Without it, a character with nothing to say is a dead end.
The menu itself is authored on the character, not here. See The talk menu.
See also
- Blocks reference — every block a dialogue node can hold.
- Dialogue and the stage — writing a line, dressing the scene.
- Choices and decisions — branching, conditions and effects.
- Subgraphs — nesting a graph and routing its outcome.
- Transitions — leaving the novel.
- Core concepts — project, context, graph, node, block.