

beasty-visual-novel / production / ui-prefabs.md
UI prefabs
Everything the player sees is a uGUI prefab (uGUI is Unity’s built-in UI system). There is no custom rendering layer, no proprietary UI framework and no hidden canvas: it is Unity UI, in prefabs you can open and edit. This page lists them, and shows the two ways to restyle the game.
The prefabs
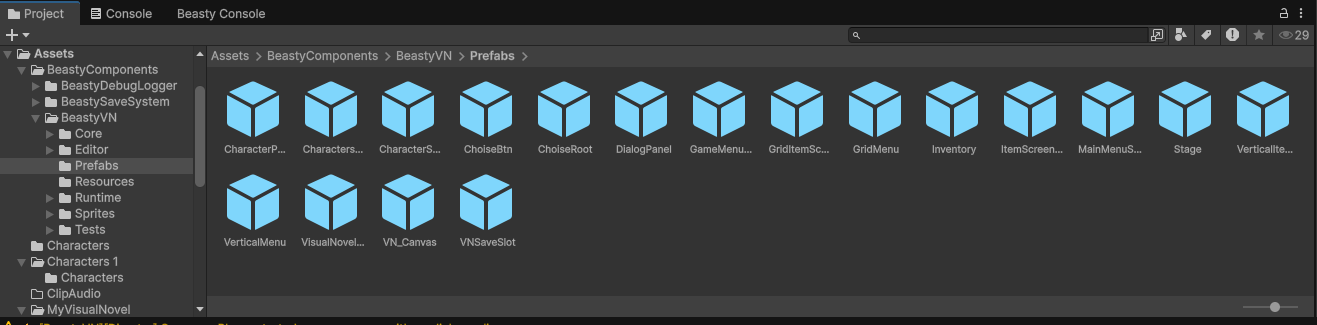
| Prefab | What it mounts |
|---|---|
VisualNovelScene | A whole ready-made scene: everything below, already wired. |
VN_Canvas | The entire interface in one prefab: the dialogue view, the choice view, and the menu manager with the main menu, game menu, save/load, preferences, history, credits and help screens, plus the confirm dialog and the loading screen. |
Stage | The stage (backdrop, characters, props) and the free-roam scenario. |
DialogPanel | The dialogue panel: the name plate and the line. |
ChoiseRoot, ChoiseBtn | The choice container and the choice button template. |
MainMenuScreen, GameMenuScreen, VNMenuRoot | The menus. |
VNSaveSlot | One save slot cell, instantiated once per slot. |
VNBacklogEntry | One history line, instantiated once per line. |
Inventory | The inventory screen, its slots and the item detail popup. |
CharactersMenu, CharacterProfile, CharacterStats, CharacterRoutine | The character screens: the cast list, the profile with its tab bar, the stats panel and the routine calendar. |
GridMenu, VerticalMenu and the item-element templates | The layouts an overlay screen is built from. |
BeastyVNMixer | The AudioMixer, with a group per channel (Music, Ambient, Sfx, Voice). |
The full field-by-field list is in the prefab reference.
How to restyle
Option 1: edit the prefab. Open it, change the fonts, colours, sprites, layout and anchors, add your own decoration. The views find their pieces through the references you see in the Inspector, so as long as those fields still point at something, the prefab keeps working. This is the normal path and it costs nothing.
Option 2: point the views at your own canvas. The views are ordinary MonoBehaviours — plain Unity components — with references you wire in the Inspector. Build your own canvas, put the views on it, wire the fields, and the engine drives your UI instead of ours. Nothing in the runtime assumes the shipped hierarchy.
The two prefab menu items
| Menu item | Use it when |
|---|---|
Tools > Beasty VN > Setup > Upgrade UI Prefabs (keep customizations) | You want the shipped prefabs brought up to date — new pieces a newer version added — without losing your restyling. It only adds what is missing and leaves your changes alone. This is the one you normally want. |
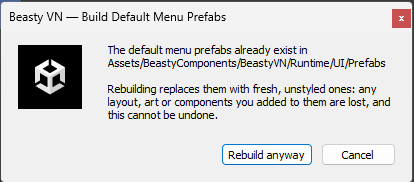
Tools > Beasty VN > Setup > Build Default Menu Prefabs | You want the menu prefabs regenerated from scratch: a plain, functional menu root with every screen and every field wired. It warns before overwriting, because it replaces the prefab, and your restyling with it. |
Reach for Build Default Menu Prefabs when a menu prefab is broken beyond repair, or when you want a clean baseline to restyle. Reach for Upgrade in every other case.
The black screen, and the button that fixes it

Warning The prefabs reference each other, and the scene resolves the views by type rather than by a path you maintain. If you rebuild a menu prefab, or reorganise one heavily, a reference the scene was holding can end up pointing at nothing. The symptom is distinctive: the game boots to a black screen, the engine is clearly running, and there is not a single error in the console.
Before you debug anything else, select the BeastyManager in your scene and press Auto-wire / Repair. That is almost always the fix.
Auto-wire re-resolves the scene’s views and re-creates any manager that went missing. It only fills EMPTY references — it never overwrites wiring you did yourself — so it is safe to press at any time. See Validation and ids for exactly what it guarantees.
See also
- Prefab reference — every prefab and its fields.
- Screens and HUD — building your own overlay screens out of these layouts.
- Character screens — the cast list, profile, stats, calendar and quest log.
- Audio and music — the mixer prefab.