

beasty-visual-novel / getting-started / installation.md
Installation
What you need before you import Beasty Visual Novel, what happens when you do, and what each folder in the package is for. Read the render pipeline and input sections even if you are in a hurry — they are the two places where a Unity package usually costs you an afternoon, and here they cost you nothing.
Requirements
| Unity | 6000.2 or newer (Unity 6.2+) |
| Render pipeline | Built-in, URP (including the 2D Renderer), or HDRP |
| Input | New Input System, classic Input Manager, or both |
| Required Unity packages | uGUI and TextMeshPro |
| Optional Unity packages | Addressables (only for streaming) |
| Scripting backends | Mono and IL2CPP |
Every Unity 6 generation from 6.2 through 6.5 compiles and imports warning-free. Where a newer
generation renamed an API (6.5 turned GetInstanceID into a compile error, 6.4 replaced a couple of
lookups), the package switches internally — nothing for you to configure.
Render pipeline: any of them, unchanged
The package works on Built-in, URP (the 2D Renderer included) and HDRP with no changes and no setup step.
That is not a compatibility claim; it is a consequence of what the package is made of. It ships no shaders and no materials of its own. Everything the player sees is either:
- uGUI + TextMeshPro — the dialogue box, the choices, the menus, the inventory, the character screens. Unity’s UI renders the same on every pipeline.
- SpriteRenderer with Unity’s default sprite material — the backdrop, the characters on stage, the props, the free-roam rooms.
So there is nothing to upgrade and nothing to convert when you switch pipeline. Your own art is your own business, but the package will not ask you to run a material upgrader over it.
Input: it compiles either way
The package works with the new Input System, with the classic Input Manager, or with both. It
follows your project’s own Active Input Handling setting (Edit > Project Settings > Player) and
chooses the matching layer at runtime.
The practical consequence: it compiles in a project that has never installed the Input System package. No assembly in the package references it directly. If you later install the Input System, nothing breaks and nothing needs rewiring.
Key bindings are not an .inputactions asset. They are a serialized config edited with dropdowns in the
Controls section of the BeastyManager inspector, and the player can rebind them at runtime. See
Input and controls.
Required Unity packages
uGUI and TextMeshPro. Both are present in a default Unity 6 project, so in practice you already have them. If you stripped them out of a minimal project, add them back from the Package Manager before importing.
Addressables is optional. The streaming module only compiles when com.unity.addressables is in the
project. Without it, everything works normally with direct references — which is the default and costs
nothing. See Streaming.
Beasty Save System is bundled
Beasty Save System ships inside this package. Do not import it separately. If you already own it as a standalone package, do not import both copies — you will end up with two copies of the same assemblies and the project will not compile. You get the full version, not a cut-down one: saving is Beasty Save System.
Beasty Console is not inside the package — it is its own asset, and optional. With it in the project, every message the VN prints lands in its window; without it, the messages go to Unity’s own Console. Either way, nothing to configure — see Logging.
There are no other dependencies. No third-party libraries, no external packages, nothing to install from a registry.
Platforms
| Platform | Status |
|---|---|
| Windows, macOS, Linux (standalone) | Supported |
| iOS, Android | Supported |
| WebGL | Not supported |
Warning WebGL is not supported. The save pipeline writes save files to disk through the normal filesystem, which WebGL does not provide. The story would play, but saving and loading would not work, so the platform is not supported rather than half-supported. If your game must run in a browser, this is the version to skip.
Both Mono and IL2CPP scripting backends are supported. See Building and platforms for what to check before you ship.
Importing
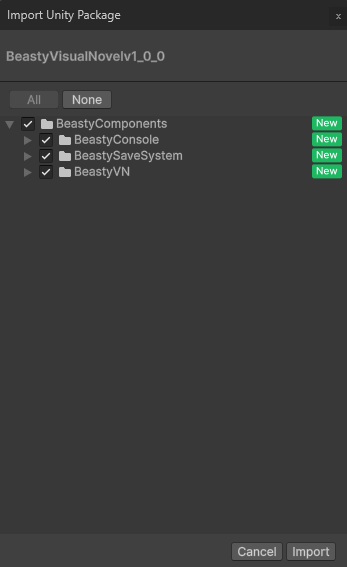
- In Unity, open Window > Package Manager, select My Assets, find Beasty Visual Novel and press Download, then Import.
- Import everything. The folders depend on each other: the editor tools need the core data model, and the runtime needs the prefabs.
- Wait for the compile to finish. You should now have a Tools > Beasty VN menu.
- If the menu is not there, look for compile errors in the Console. The usual cause is a second copy of Beasty Save System already in the project (see above).
Next: Your first scene.
What is in the package
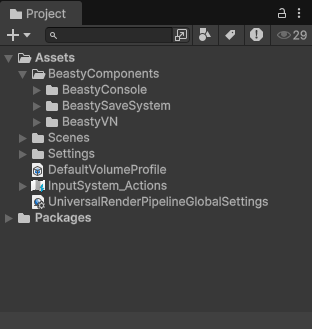
The package installs under Assets/BeastyComponents/BeastyVN/.
| Folder | What it is |
|---|---|
Core/ | The data model and the pure story logic. No Unity UI in here. This is the assembly you can build against if you want to replace the presentation layer entirely. |
Runtime/ | Everything that runs in a build: the controllers, the views, the input layer, the save integration, the streaming module. |
Editor/ | All the authoring tools — the Beasty VN window, the graph, the free-roam editor, the validator, the code generators. None of this ends up in your build. |
Prefabs/ | The ready-made UI and scene prefabs: the canvas with every screen inside it, the stage, the dialogue panel, the menus, the character screens. Restyle them. See UI prefabs. |
Resources/ | VNSettings.asset and UILocalization.asset. These two are read at runtime, which is why they live here. See VN settings. |
Sprites/ | Placeholder art, so a fresh scene shows something instead of nothing — the UI’s sprites and the House Demo’s labeled placeholder PNGs. Replace any file with your own art of the same name. |
Demos/ | The House Demo: a complete, playable mini-game built with the asset — open HouseDemo/HouseDemo.unity and press Play. See The House Demo. |
Beside those folders sit the files that travel with the package: README.md, BeastyVN_CHANGELOG.md,
Third-Party Notices.txt, and BeastyVN_Documentation.pdf — an offline copy of the documentation;
this site is the living version.
Leave the package where it imports. Two things depend on it: VNSettings.asset and UILocalization.asset
must stay inside a Resources folder to be readable at runtime, and the scene wizard looks for the Stage
prefab at its default path. Your own content — scenes, characters, art, scripts — goes wherever you like;
the editor asks you for a folder when it creates assets.